• Entertainment
  • Musicians
  • My Experiences
  • Playing Guitar

Guitar Licks and Tips

  • Home
  • Blog
  • About
  • Archives
  • Guest Blogger
  • Links
  • Contact

You are here: Home / Archives for Equipment

Home Studios – The Best Way To Demo Your Band!

June 11, 2013 by Chris

 Home Studios – The Best Way to Demo Your Band!

If you’re in a band you’ll know that you will only get so far without demos. After a bit of live gigging you’ll be feeling match fit and that’s the time to start thinking about getting some demos done. If you have already spent some time looking into this then you’ll know the costs involved. Hiring a studio for the day is expensive and that’s before you add on the extra costs for example an engineer and producer. Assuming you can get it all done in a day (which will be a battle in itself) you’ll then have to pay for the track or tracks to be mixed and mastered and finally produced. It’s a big exercise and one that not many bands can afford without financial backing.

The way forward is to do it yourself! Your set up costs won’t be anything near as much as getting it done professionally. Ok it may be flawed but the people who are going to listen are going to know you’re on a budget so they will make allowances for that. The beauty of doing it this way is that once you are set you can record as much as you like at a pace that suits you. You’ll be far more relaxed when you’re not on a deadline. Here’s how to get started:

What You’ll Need

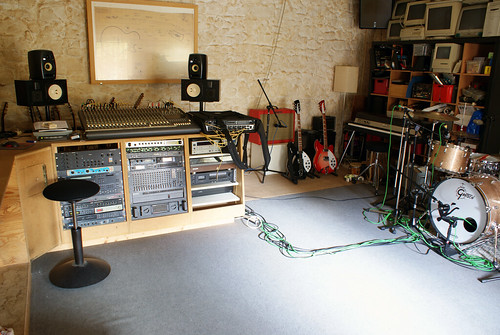
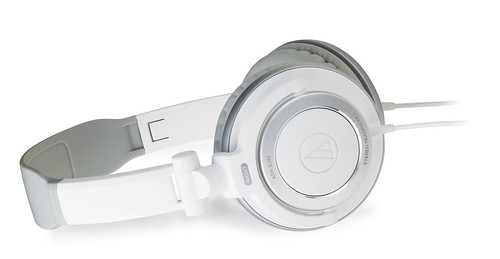
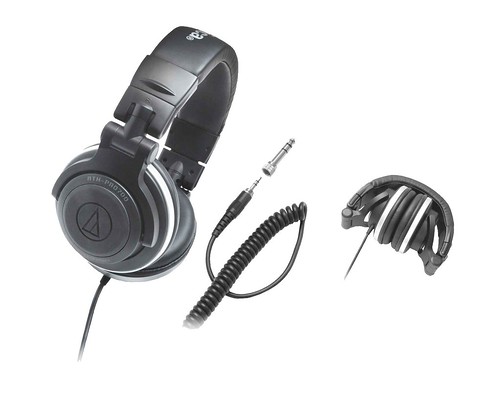
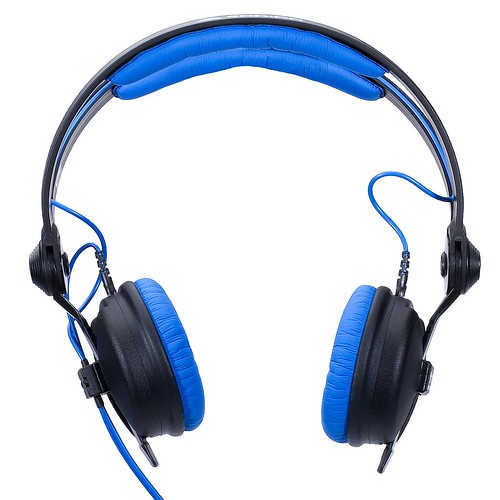
You’ll need some audio recording software such as Cubase or ProTools. If you’re on a real budget you can find free downloads of similar software without as many bells and whistles. Then you’ll need some decent microphones. The drum kit will need to be mic’d up (with a bass mic in the bass drum) and any instruments without Direct Inputs will need ambient microphones. The one thing you should really invest in is a really good quality vocal condenser mic, as the clarity of your vocals is really important. Guitars can be plugged into a mixing desk (which you probably already have if you have your own PA). Once you’ve got all this you’re pretty much good to go!

The Room

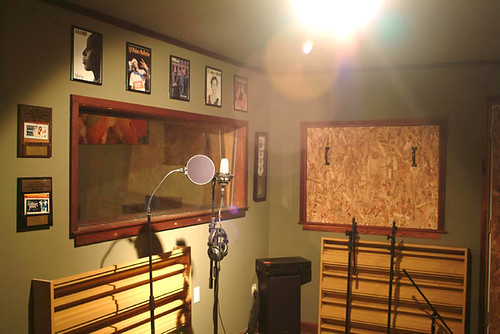
There’s another thing to think about before you start though. You’ll need to record in a room that is suitable. Some people use garages or rooms that aren’t used much – the last thing you want is loads of people coming in and out. Lock the doors so you are not disturbed and it’s really important that you get some insulation foam up on the walls. This will act as a sound-proofer so your neighbours won’t get too angry, and it will also soak up any echoes meaning you will get a much dryer sound to record with.

Once you’ve got your room and all your gear ready it’s time to get that epic album down on record! Start by laying down the drums, bass and guide vocals. Add in the guitars once by one and when you’re totally happy then throw the proper vocals (making sure you remove the guide!). Get it mixed, mastered and produced and start selling it (and start paying off the gear!).

Attached Images:
  •  License: Creative Commons image source
  •  License: Creative Commons image source
  •  License: Creative Commons image source

The contributor of this post, Sam Wellback, is a music producer and likes to reach out to his audience through his blogs. He likes to write about ways to record demo songs at home. He also shares factors that should be kept in mind while recording, such as insulation of the recording room and prerequisite audio recording software like Cubase or Pro Tools etc.


Filed Under: Equipment, Musicians Tagged With: audio recording software, band, budget, condenser mic, costs, demo, demos, drum kit, expensive, gig, guitars, home studios, insulation, mastered, microphones, mixing desk, neighbors, PA, room, save money, sound proof, studio time, tracks, Vocals

4 Tricks To Improve The Sound Quality Of Your Headphones

December 21, 2012 by Chris

In spite of the fact that some people do not mind spending a small fortune on a state-of-the-art pair of headphones with a limited three year warranty, they do get upset when the quality of the sound is ghastly. Unfortunately, in the vast majority of cases the poor sound quality stems from the fact that they did not purchase the right pair to start with. In other words, when it comes to headsets, it is best to shop around until you find something that suits you, rather than acquire an expensive pair of earpieces only simply because they are popular. The good news is that even if you did get stuck with a pair of headphones with poor sound quality, there are still a few hacks you could try before storing them away for good. Let’s elaborate!

1. Try to clean them first

Even though cleaning the earpieces regularly might seem intuitive, you would be surprised about the number of people who “forget” about this little aspect. In the eventuality that you notice the sound in your headphones has decreased lately, then it is time to clean them up. Besides, washing them is a fairly easy activity as you all need to do is wipe them with a mildly wet cloth and soft soap. In case they include metal parts that are extremely dirty, then you can clean them with a toothbrush.

2. Are you using them properly?

While this is surely not the only pair of headphones you had, it is necessary to point out that no earpiece is like the other. To put it simply, it could very well be that you grew accustomed to your old pair of headsets so much that you are using your new headphones in a similar manner. This is especially true for the in-ear buds and a good method of getting the best sound out of them is to “tinker” with them until they feel comfortable and the sound improves.

3. You could turn them into speakers

If the cleaning did not do the trick, then you could always try to turn them into speakers. More often than not, people often find themselves in the situation when they would absolutely love to listen to some music while cleaning the house, organizing their desk or doing a repetitive task. Sadly, the only thing they actually have in their home is a pair of headsets. However, did you know that you could attach two paper cups to the earpieces and transform them into veritable speakers? And, the best part is that this “construction” also improves the quality of the sound.

4. Integrate some noise isolating features

In the eventuality that regardless of what you do, you keep hearing the background noise rather than your favorite music, then you should consider adding some noise isolating features. The open pair headsets’ sound quality can be boosted exponentially if you attach it to a nice set of industrial earmuffs, whereas for the in-ear buds you can use some earplug foam to isolate the background sound. As a side note, there are plenty of DIY guides on the web as well as specialized services that could lend you a hand in this case.

Featured images:
  •  License: Creative Commons image source
  •  License: Creative Commons image source
  •  License: Creative Commons image source
  •  License: Creative Commons image source

Richard Simpson loves technology and music. He works with a premier online headphones retailer based in Australia.

Filed Under: Equipment, Recreation Tagged With: clean, headphones, improve, noise isolation, sound, sound quality, speakers, use

A Buyers Guide for Flanger and Phaser Pedals

September 26, 2012 by Chris

Flanger and Phaser pedals can do great things for your sound, but there are a lot of things to think about before you go shopping for one. This guide explains flanging and phasing, and walks you through some of the big questions you should ask before you buy one.

What are phasing and flanging, and how do they differ?

Flanging and Phasing are similar effects produced in different ways. Both alter your sound by splitting the input source into two paths, an unaffected and an affected tone, and mixing them back together. This causes the waves of the two sounds to interfere with each other, producing the swoop or shimmer (or spooky space-age psychedelia!) we call flanging or phasing.

Flanging is produced by slightly slowing down and speeding up a tone that is then mixed with an unaffected “dry” tone. It originated as a tape effect produced by recording the same sound onto two different tape decks and mixing them together on a third tape while slightly slowing down and speeding up one of the machines. In most cases, flanging is now produced via analog or digital signal processing, and not tape. Phasing has always been a signal processing effect. It uses an “all pass filter” to force some frequencies of a signal out of phase with the dry signal. The two effects are in some ways quite similar, and the terms are occasionally used interchangeably.

Flanging is technically a kind of phasing. It occurs when frequencies in the affected and the dry signal go out of phase with one another and produce interference. The difference between flanging and phasing has to do with the way the phase cancellations are produced: a flanger delays the entire signal, thus sends all of the frequencies of the signal out of phase with the dry tone, while a phaser generally manipulates some number of specific frequencies in the signal. Subjectively, this gives flangers a pronounced and regular ‘whoosh’ sound and phasers a more space-y, random, or unsettling alteration to the sound.

Stereo phasers use two identical phaser circuits for the left and the right channel and put them out of phase with one another.

That’s really interesting, but which one should I buy, Mr. Smarty-Pants?

All this technical stuff is nice, but how should you pick one?

Well that depends on what you’re looking for. There are flangers and phasers that offer many ways of manipulating the sound, as well as ones that produce a specific effect without much variation: one knob and a switch or two. Some of these are really well known, like the ElectroHarmonix Small Stone and the MXR Phase 90. They sound like they sound, and lots of people think they sound really cool.

Two famous examples:

  • The classic Eddie Van Halen sound from early Van Halen records was produced with a Phase 90 and an MXR M117R Flanger, and
  • The late 70’s Rolling Stones sound on tunes like “Shattered” is all about the Small Stone.

That’s great, but which one should I buy?

Only you can decide what you want from your sound. But here are some questions you should ask yourself before you go shopping:

  1. Am I looking for a pedal with a signature sound, or one that can do a bunch of different things?

Flanger pedals tend to have a wider range of control, because phaser pedals’ selling points tend to revolve more around a signature sound based on hardwired presets.

There are phasers with a wider range of control that edge into full Low Frequency Oscillator territory, and are like having little synthesizers at your feet. They can also set you back $300 or more.

So you should decide whether you want a specific kind of effect, like a Phase 90 or Small Stone, or a versatile box that can produce a wide range of effects, like the Moog Moogerfooger. If you’re looking for a box with a signature sound you can skip the next questions and go on to my final bit of advice.

If you’re looking for a versatile box, there are two more questions to ask:

  1. How many parameters can I control?
  2. How much control do I have over each parameter I can control?

Phasers and flangers both have controls for speed and depth, and often a “feedback” control (sometimes called something like “enhance” or “sensitivity”). Together these control how fast the effect is, how wide the effect is, and how prominent it is in your mix.

Flangers often also have a control called “delay time” or “manual” that determines the intensity of the effect. This is different than the effect’s prominence in your mix. It determines something more like how “off” or skewed the effected sound it, while the above effects have more to do with how the effected sound relates to the dry tone.

Some pedals allow you to control a wide range of parameters, some allow you a wide range of control over each of the parameters, and some offer both. Only you can decide whether you want to have a lot of versatility, the ability to make your sound crazy wild and over the top, or both. So:

A Final Bit of Advice:

Once you have an idea what you’re looking for, look at the range of pedals available on the website of an online music retailer. Search for “flanger” or “phaser” and browse the list of options that comes up. Then browse manufacturer websites or search on YouTube for demos. There are videos online for almost every kind of pedal available produced by the manufacturers themselves, as well as by music stores and private individuals that demonstrate the range of control each pedal offers, and its personality (or lack thereof). These demos can sometimes be even more valuable than trying out a pedal yourself, because they are produced by someone who has already spent a lot of time with the box, and who may be privy to the way it was constructed and designed.

Bruno Sturgess loves to help musicians get the most from their effects pedals.

Filed Under: Equipment, Pedal Effects Tagged With: analog, controls, delay time, digital, effect, electroharmonix small stone, flanger, flanging, input source, manual, Moog, mxr phase 90, pedals, phaser pedals, phasing, signal processing, signature sound, slowing, sound, speeding, splitting, tone, versatile box, wide range

  • 1
  • 2
  • 3
  • …
  • 16
  • Next Page »

Categories

Sites to Visit

Eavestrough Cleaning Toronto

Subscribe


Read Guitar Licks and Tips
in an RSS Reader
Subscribe Now!
It's Free!

Subscribe to
Guitar Licks and Tips
by Email
It's FREE!


Follow us on TWITTER!

Recent Posts

  • Four Of The Greatest Classical Pianists To Tinkle The Ivories In The Modern Day
  • How To Develop Yourself Through Music
  • Home Studios – The Best Way To Demo Your Band!
  • Forget The Beatles, We’re Going To Be Massive! – Forming Your First Band
  • Biggest Mistakes Made By Beginning Guitar Players
  • Two Unique Ways To Learn Guitar For Beginners
  • 4 Incredible Gifts That Will Capture A Music Lovers Heart
  • Top 5 Rock Guitarists Who Will Stalk Your Soul Forever
  • 4 Tricks To Improve The Sound Quality Of Your Headphones
  • How to Get the Most Out of Your Next Concert

Recent Comments

  • Guitar Boy on Biggest Mistakes Made By Beginning Guitar Players
  • Acoustic slant on old Door’s Classics – Guitar Licks and Tips on What you can get for 40 bucks and a smoke
  • ChrisBunn on Two Unique Ways To Learn Guitar For Beginners
  • motorcycle accident compensation claim on The Guitar Motorcycle
  • Oregon Wild Wood on 4 Essential Guitar Maintenance Tips

Tags

acoustic acoustic guitar band Bands bass Brantford Bruce Cockburn Canada Canadian concert day drummer ear electric event favorite Fender finger fingers fun Funny Gibson guitar guitarist guitar player guitars how to Humor instrument Jammin Live music music humor musician Musicians playing Rock song sound stage style technique Toronto Video work

Site Stats


Meta

  • Log in
  • Entries feed
  • Comments feed
  • WordPress.org

Pages

  • About
  • Archives
  • Become a Guest Blogger For Guitar Licks and Tips
  • Blog
  • Contact
  • Do Follow
  • Links
  • Privacy Policy

Connect with me

  • Facebook
  • Google Plus
  • Pinterest
  • Twitter
  • RSS

Copyright © 2025 · Metro Pro Theme on Genesis Framework · WordPress · Log in